Wednesday, 8 May 2013

Chassis Powder Coated

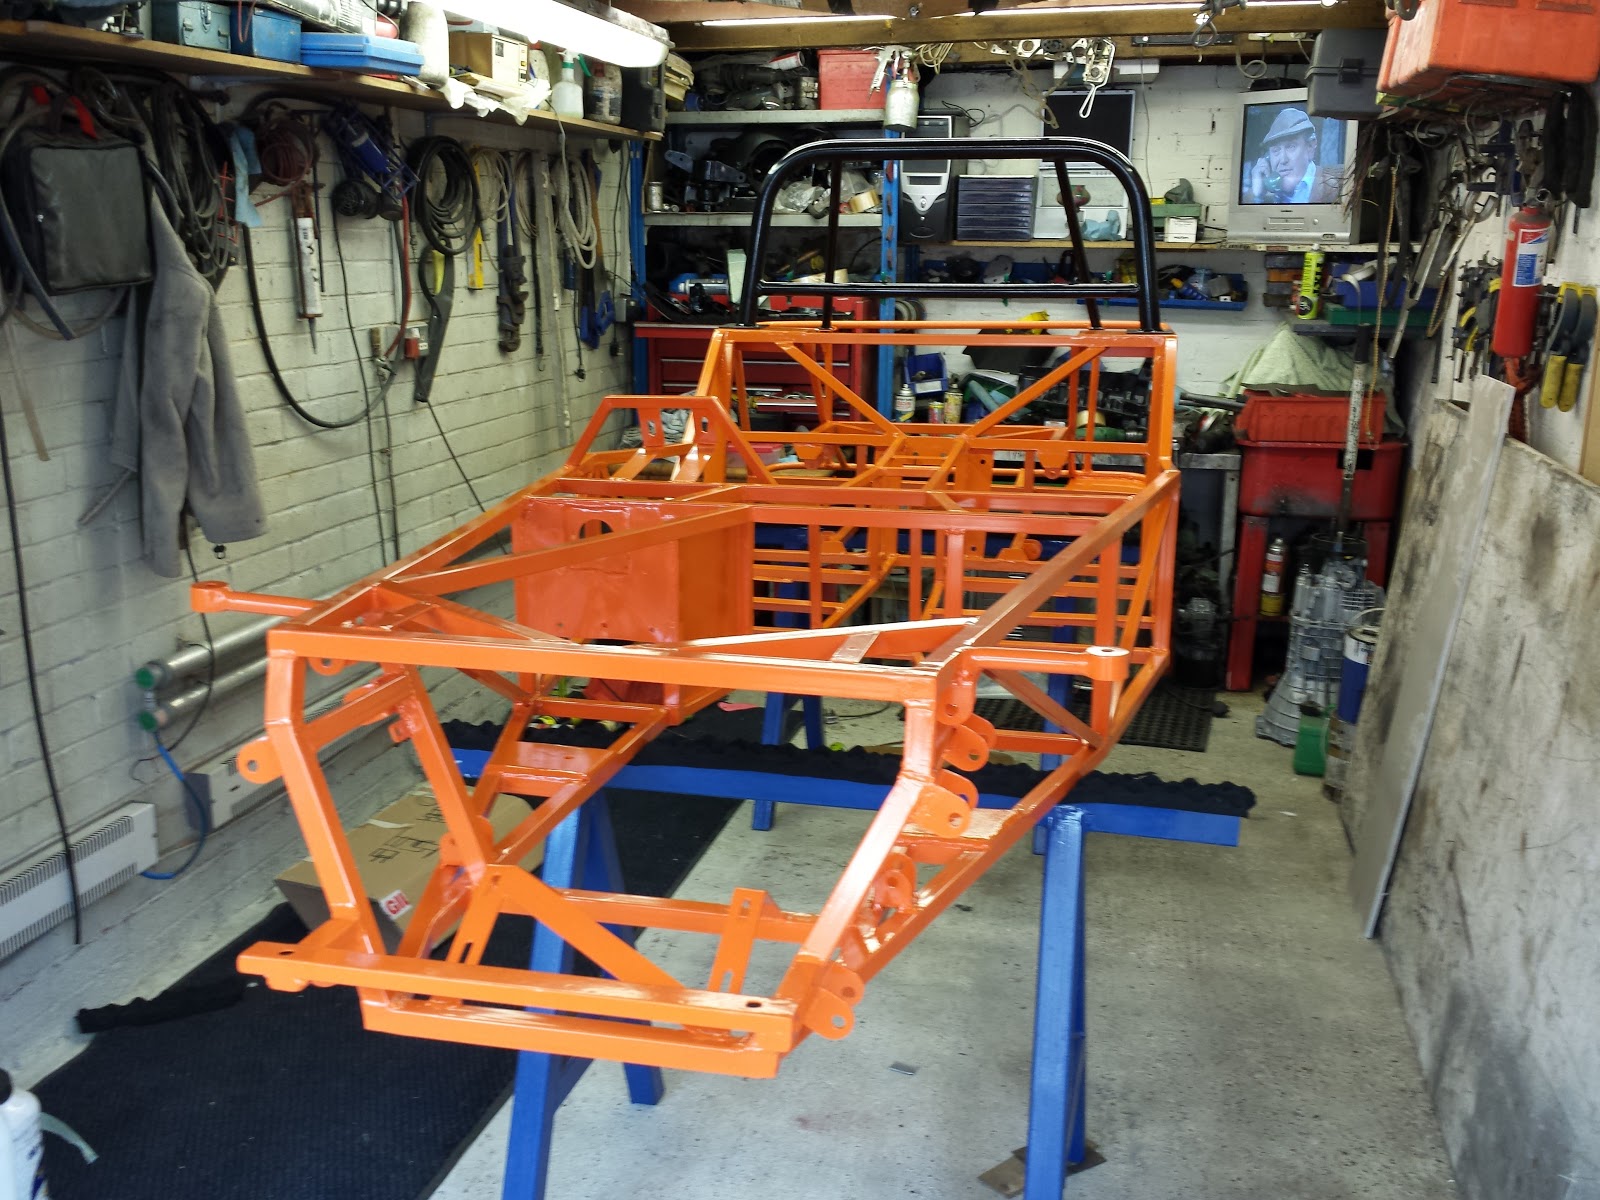
Finally got the chassis powder coated! really happy with the finish and now means we can get on with putting the car together for real rather than trying a bit and the taking it off again.

Got the odds and ends finished off on the chassis. We found the measurements for the seats we want to use on the internet so made the runners with the right spacing and we will drill the holes later.


Was nice to get the car out of the garage and get an idea for the size of it and how small it is really.


All wrapped up ready to go.

Just in time too because it chucked it down 2 mins after!

1 week later and ta daaa....


Sent a few other bits off too and they look ace! really good contrast with the orange. 


While the chassis was away we had chance to clear the garage out a bit and get the engine stripped down and painted. We have sent the rocker cover off to be powdered the same colour as the chassis.


Sunday, 14 April 2013

Finishing Off The Chassis Part 2

Had a change of plan again! When trying to get the paint for spraying the chassis the guy in the shop said straight away to get it powdered so...... once again we are going to get the chassis powder coated. had a quote of £200 which we thought is pretty good as we were expecting the paint to be around £100ish and then all the work involved would of been a pain. Had a re-think on the steering column support bearing too after reading about the standard sierra one been a bit sloppy. It has made a massive difference with this bearing in feels like you could lift the whole car with the steering wheel its that solid lol.


We put the supports in for the fuel tank and realised we had made a bit of a mistake with the flexi brake pipe brackets. We had originally put them on the top of  RS14 but when we thought about where the fuel tank would sit it was obvious why the book said to put them on the rear of RS14 so thats where they are now.

Dads been doing a great job of tidying up and finishing off ends etc on the chassis too. Really keen now to get it finished off and coated because once that's done we can start putting it together for real!


Tuesday, 2 April 2013

Finishing Off The Chassis

Had a productive weekend, got a few bits finished off on the chassis. We have decided to paint the chassis rather than powder coating because its cheaper and if we need to change or add anything to the chassis later on we can just re-paint it.

We had a few radiators kicking around but realised they were no good for a few reasons so i found a nice new clio one on the bay and the fan is from a saxo that we had already.  Made the radiator mounts from some rectangle tube, 25mm tube and plate. It was a bit of a pain to get it in the right place and hold it to weld also we have slightly offset it to allow easier access for the pipes.


It needs trimming and tidying up a bit but it works great!

We have put some extra supports in for the front top wishbones as they were overhanging a bit too much. We will have to see it the shock and coil spring will foul or not so fingers crossed.


Headlight mounts were not too bad to make and a bit of guess work with the length so we will have to check this when the body kit is on to make sure Mr IVA will be happy with the distance to the widest part of the finished car.


We had these cut when we got the chassis plates made for some reason we have 8 only need 4. They are for the flexi brake lines to hold the joint.


The book said to put the rear ones on the back face of RS14 but we decided to put them on the top seemed to make more sense as it should be easier to run the copper brake pipes round to them.

Monday, 25 March 2013

Roll Bar

This was lots of fun to do (i'm not been sarcastic either). Luckily we had enough tube to have a test run and its a good job too as the first attempt kinked. We put a smaller head on the bending machine and it worked a treat with no kinks in sight. I have a cad drawing (Link) of the top hoop so printed it to scale and used that to get the angles and lengths correct. 


We bolted the top plates on so we could measure where the top hoop would sit and so they wouldn't move around.


We made the support bar using the books height of 100mm and the spacing for the harness bolt holes was also from the book. 


Then it was a bit of guess work with the stays because we had separated them a bit more than the book says to accommodate a boot from equinox in the future. First of all we bolted some 12.9 strength bolts into the plates and fully welded them in then we cut one stay where it looked good and made the other side to match.


Rear Hubs and Seat Back Panel

New bearings for the rear hubs as the old ones were knackered!


They took some pushing in but we got there.


Made the seat back panel using a cardboard template and spaced the holes for rivets out by 50mm.


Its a tight fit so we will have to be careful once everything is painted.